最近学习了一下使用Storyboard实现页面跳转已经传值 总结一下
Storyboard跳转
1单纯的Storyboard页面跳转
新建项目 如图: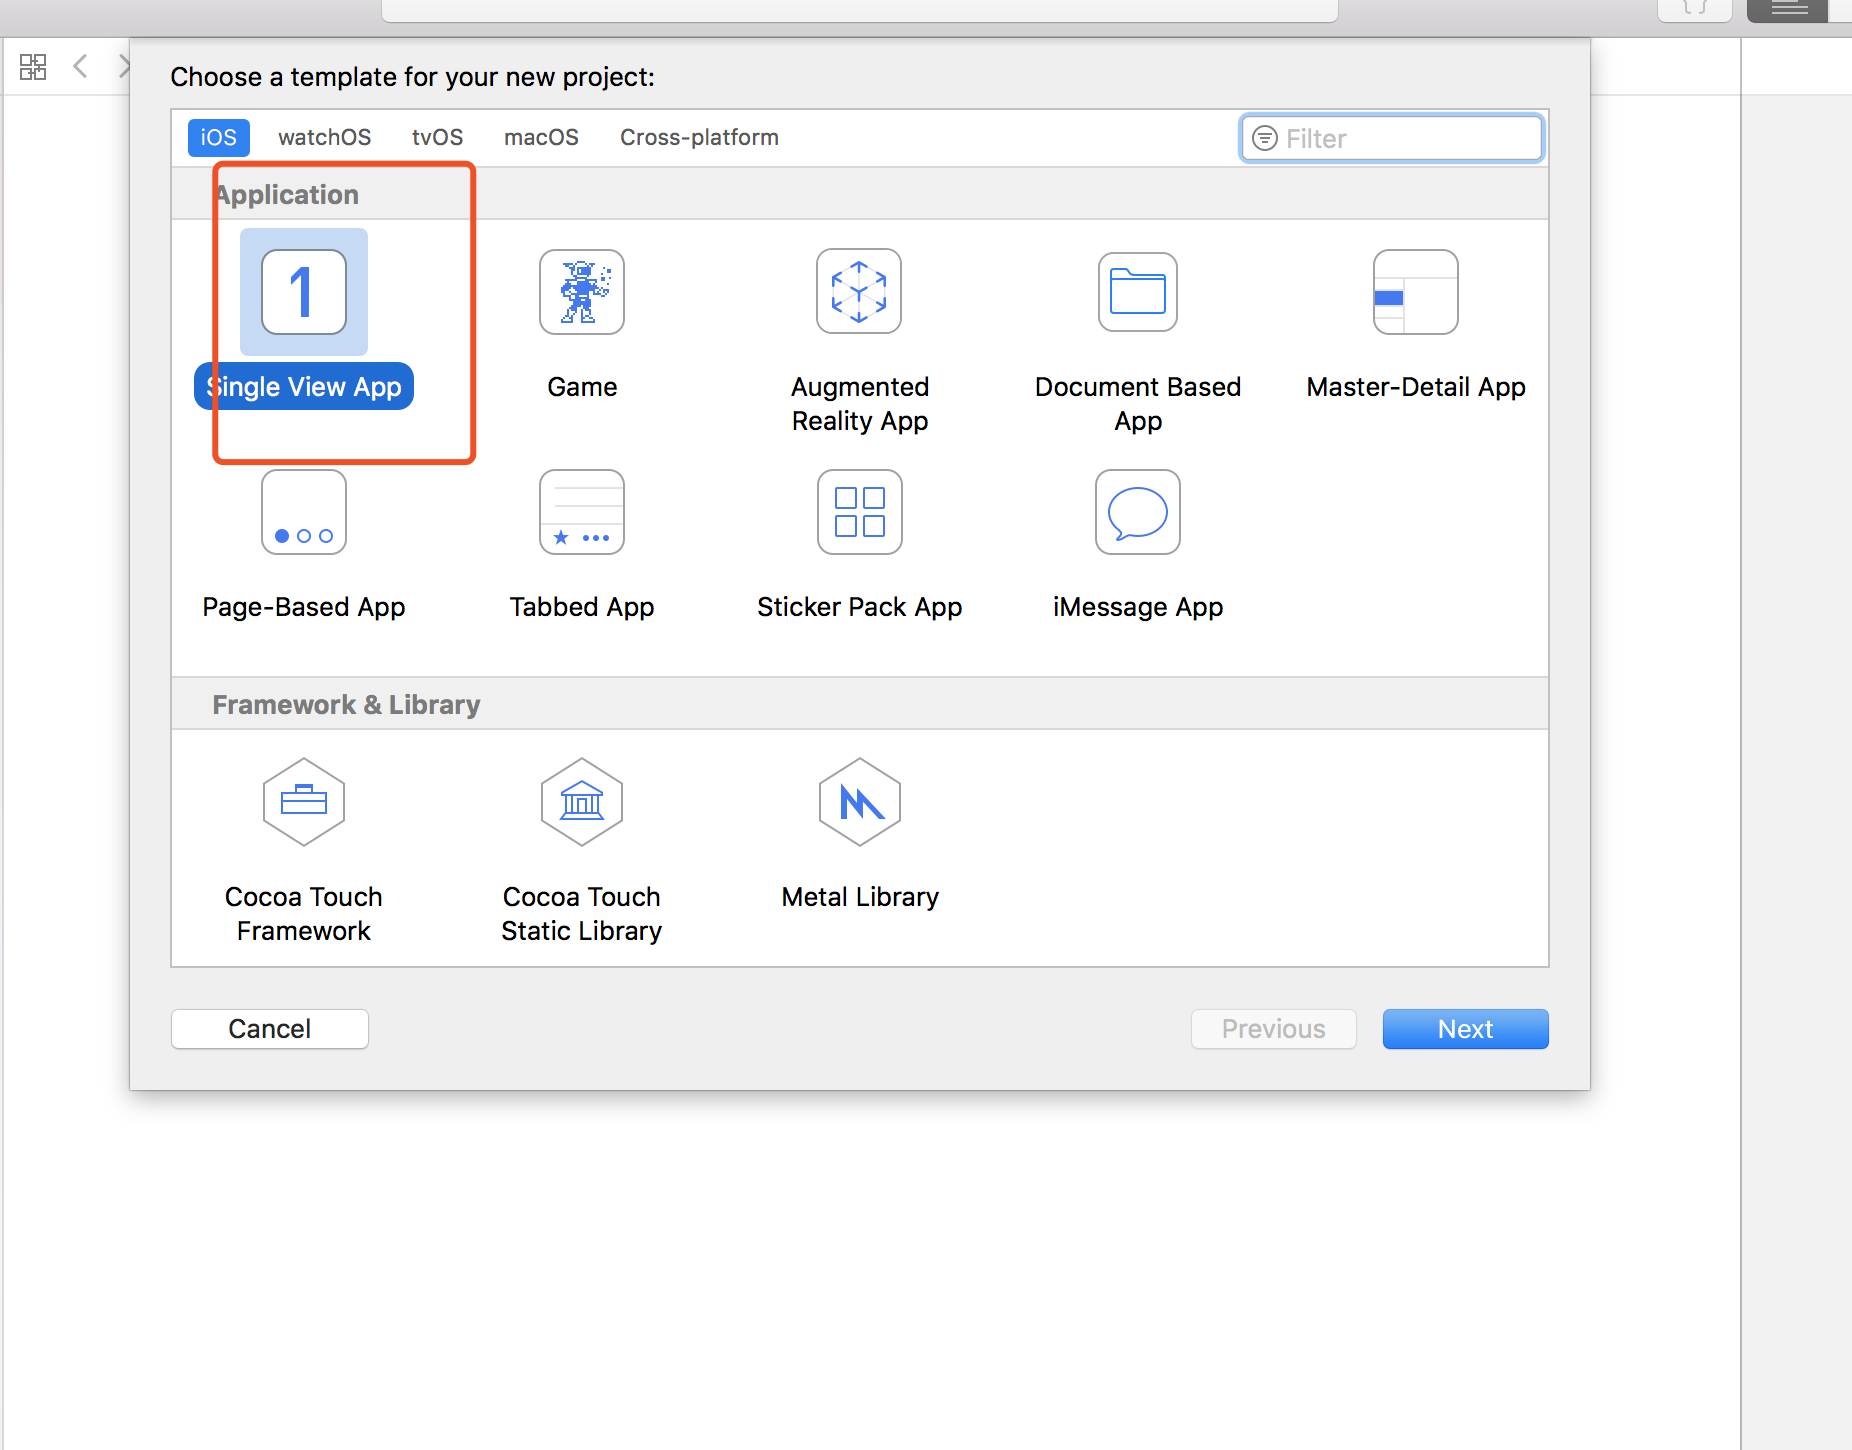
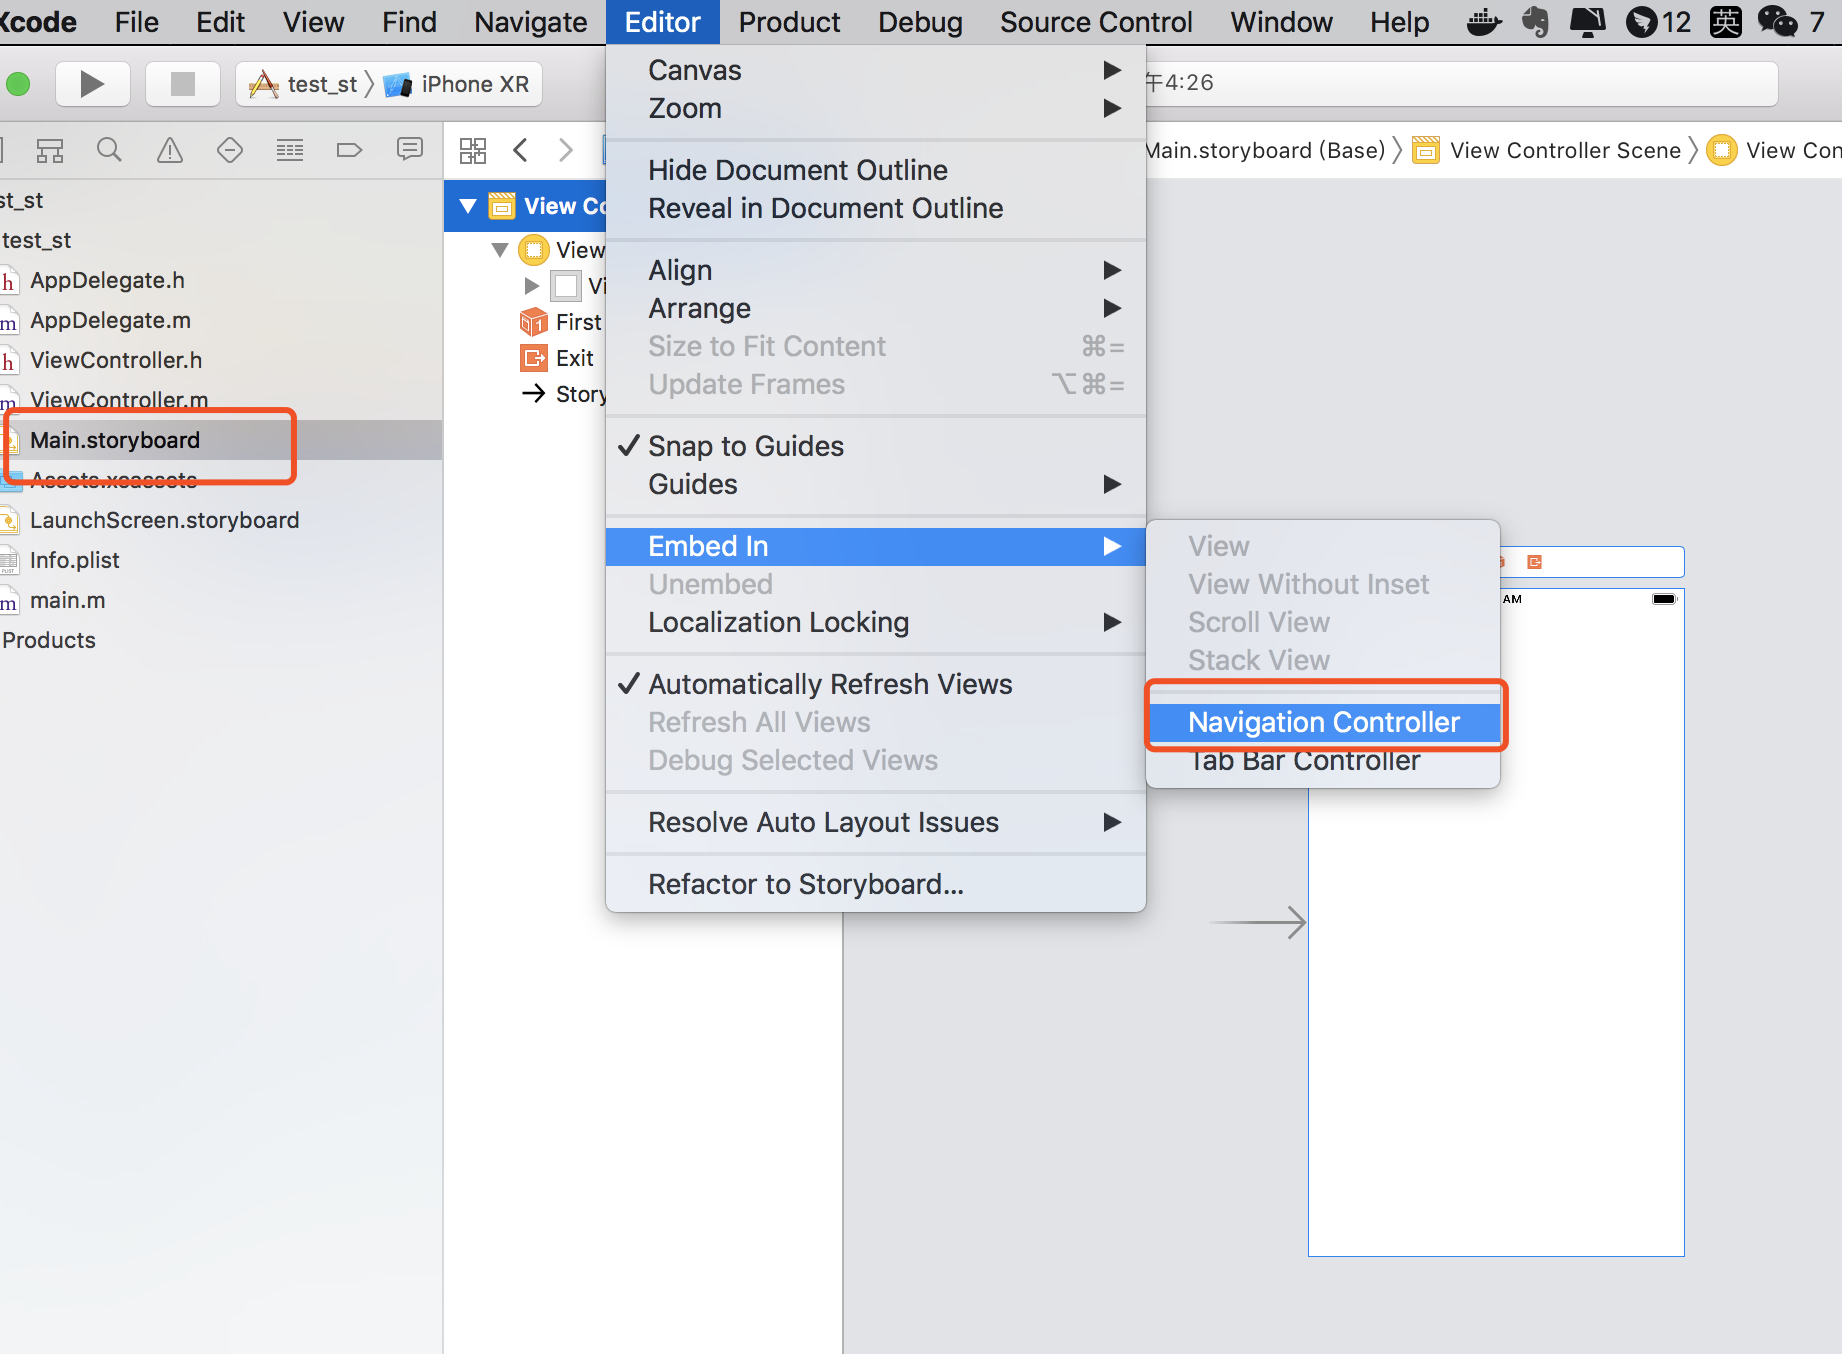
打开Main.storyboard文件 添加Navigation Controller
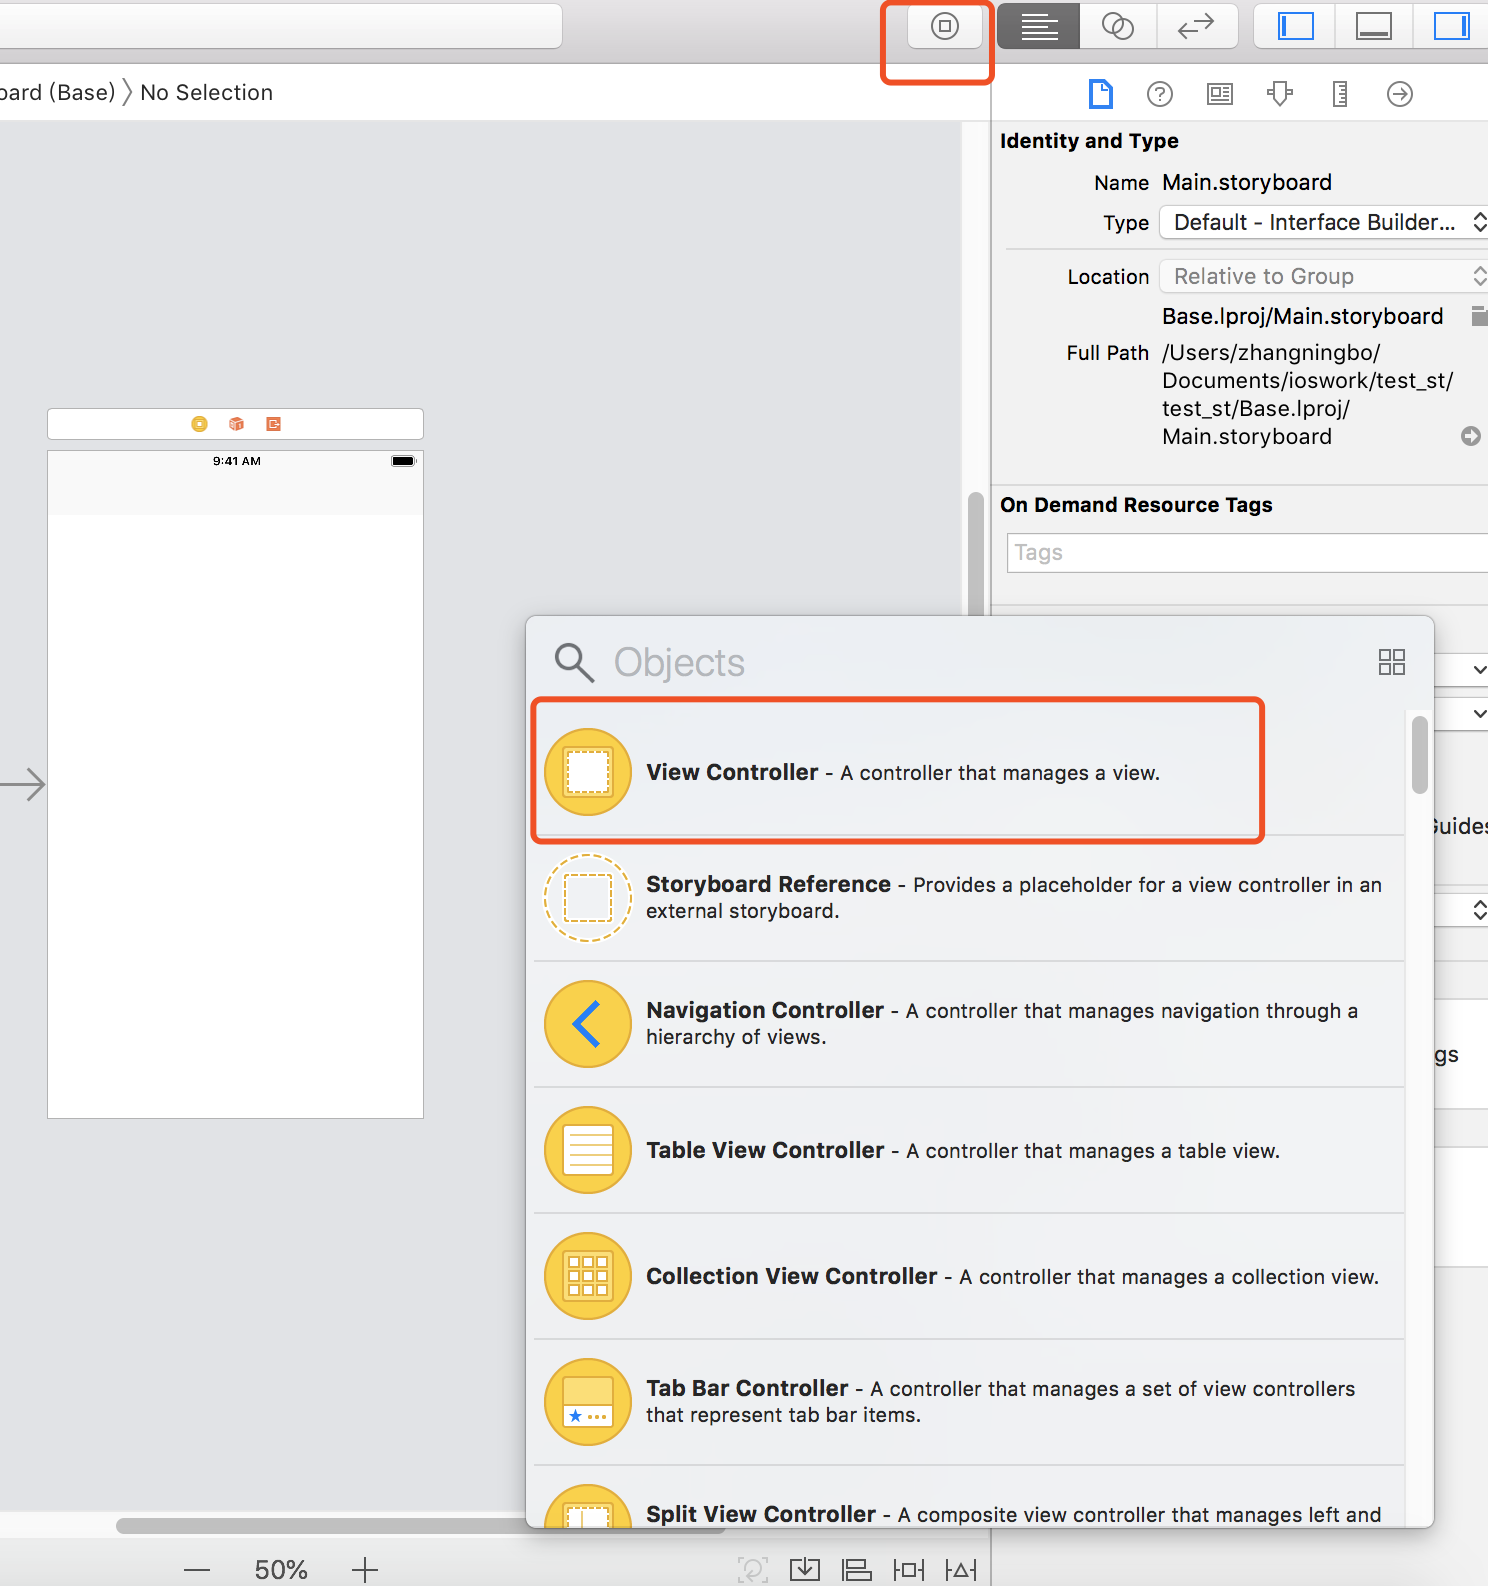
在Main.Storyboard新建一个View Controller
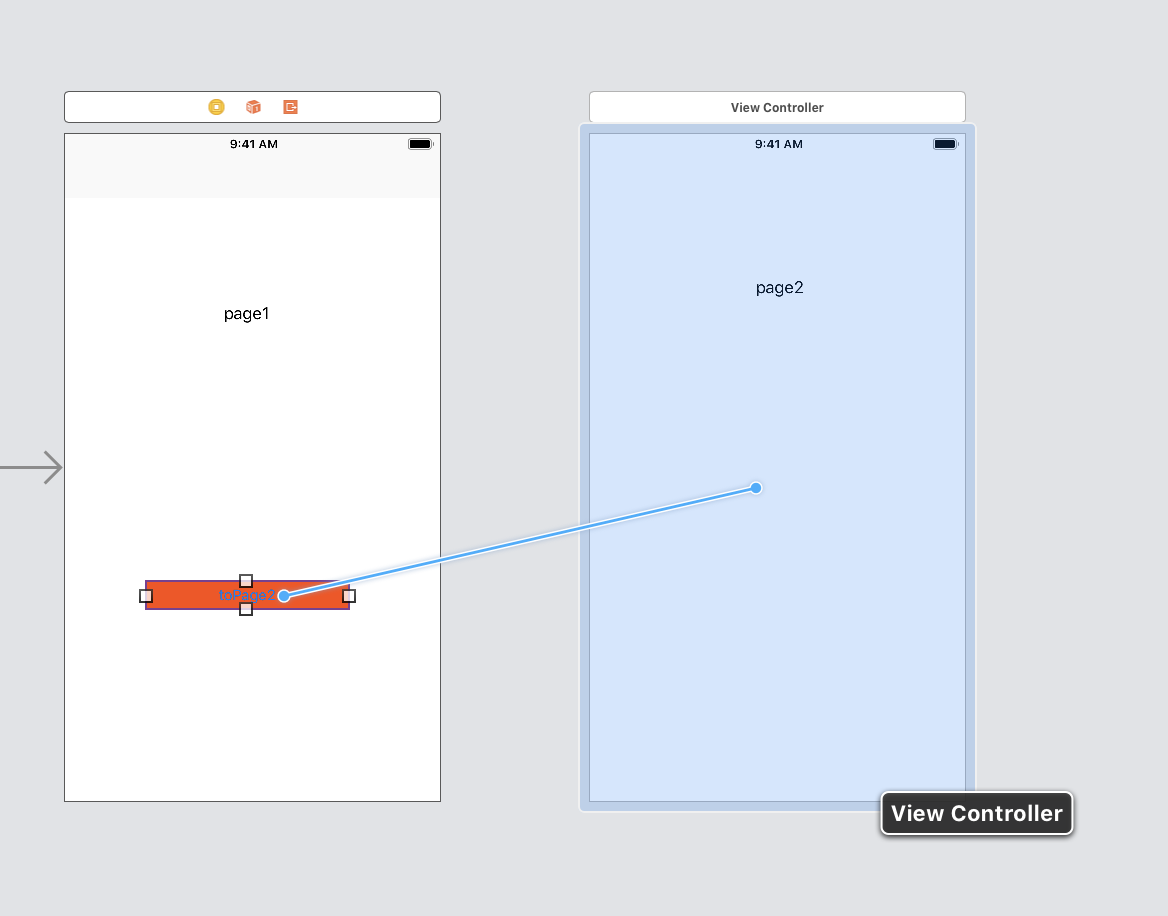
在现有的两个 Controller 中添加button 和label 并且右键button连线要跳转的Controller 如图:
选择push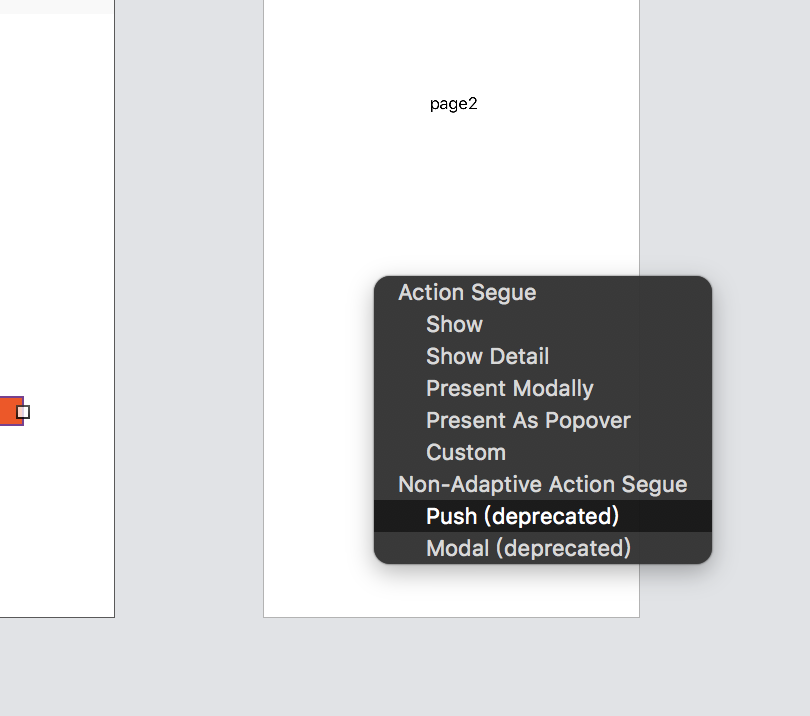
这时候两个Controller中间会出现连线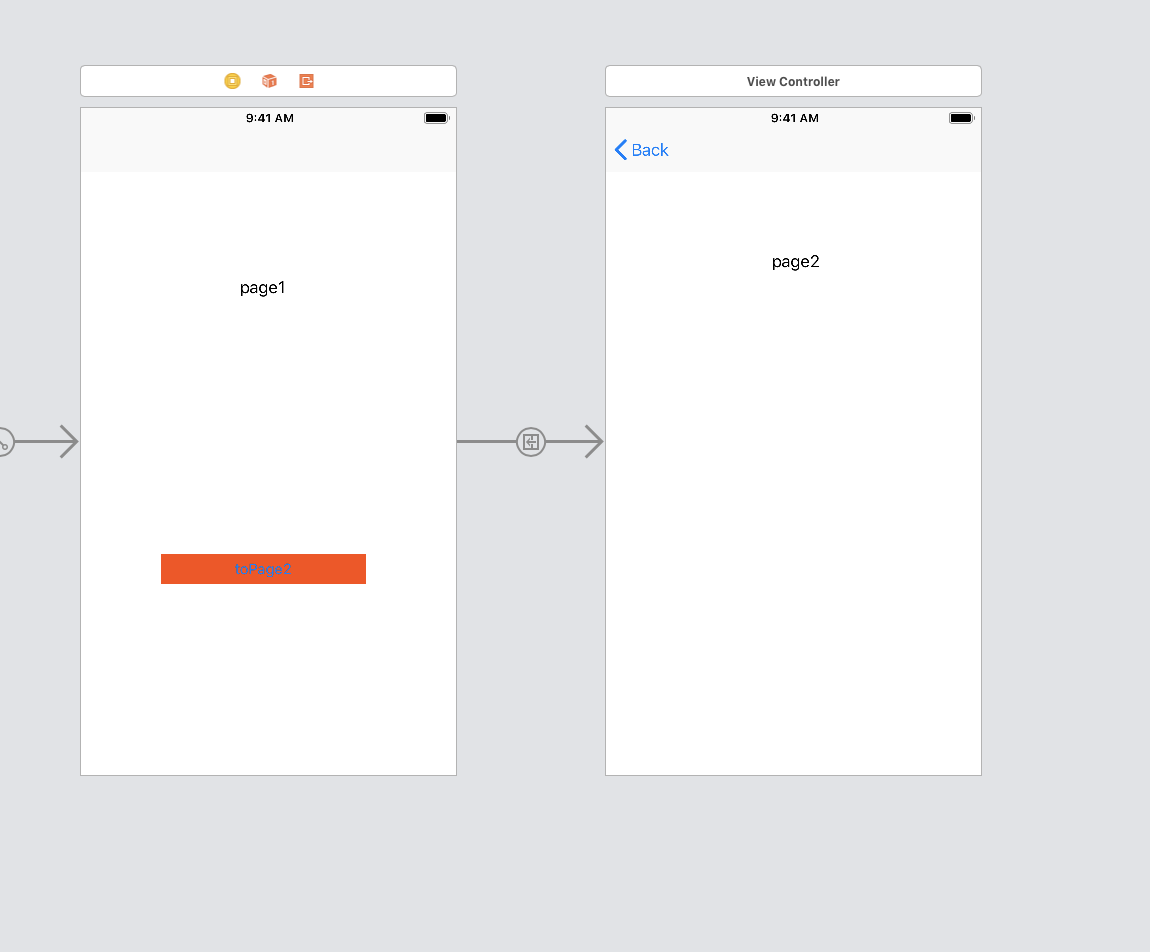
运行查看效果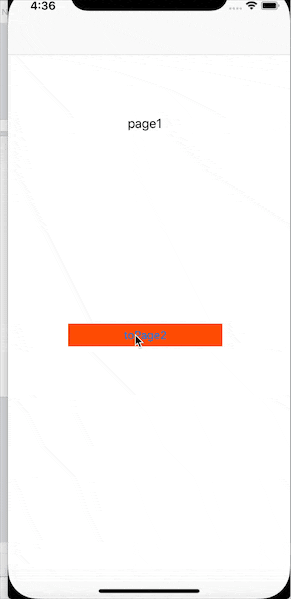
2配合代码跳转
同样 新建项目
添加Navigation Controller
Main.Storyboard新建一个View Controller
添加button 和label 但不连线
(这里略过)
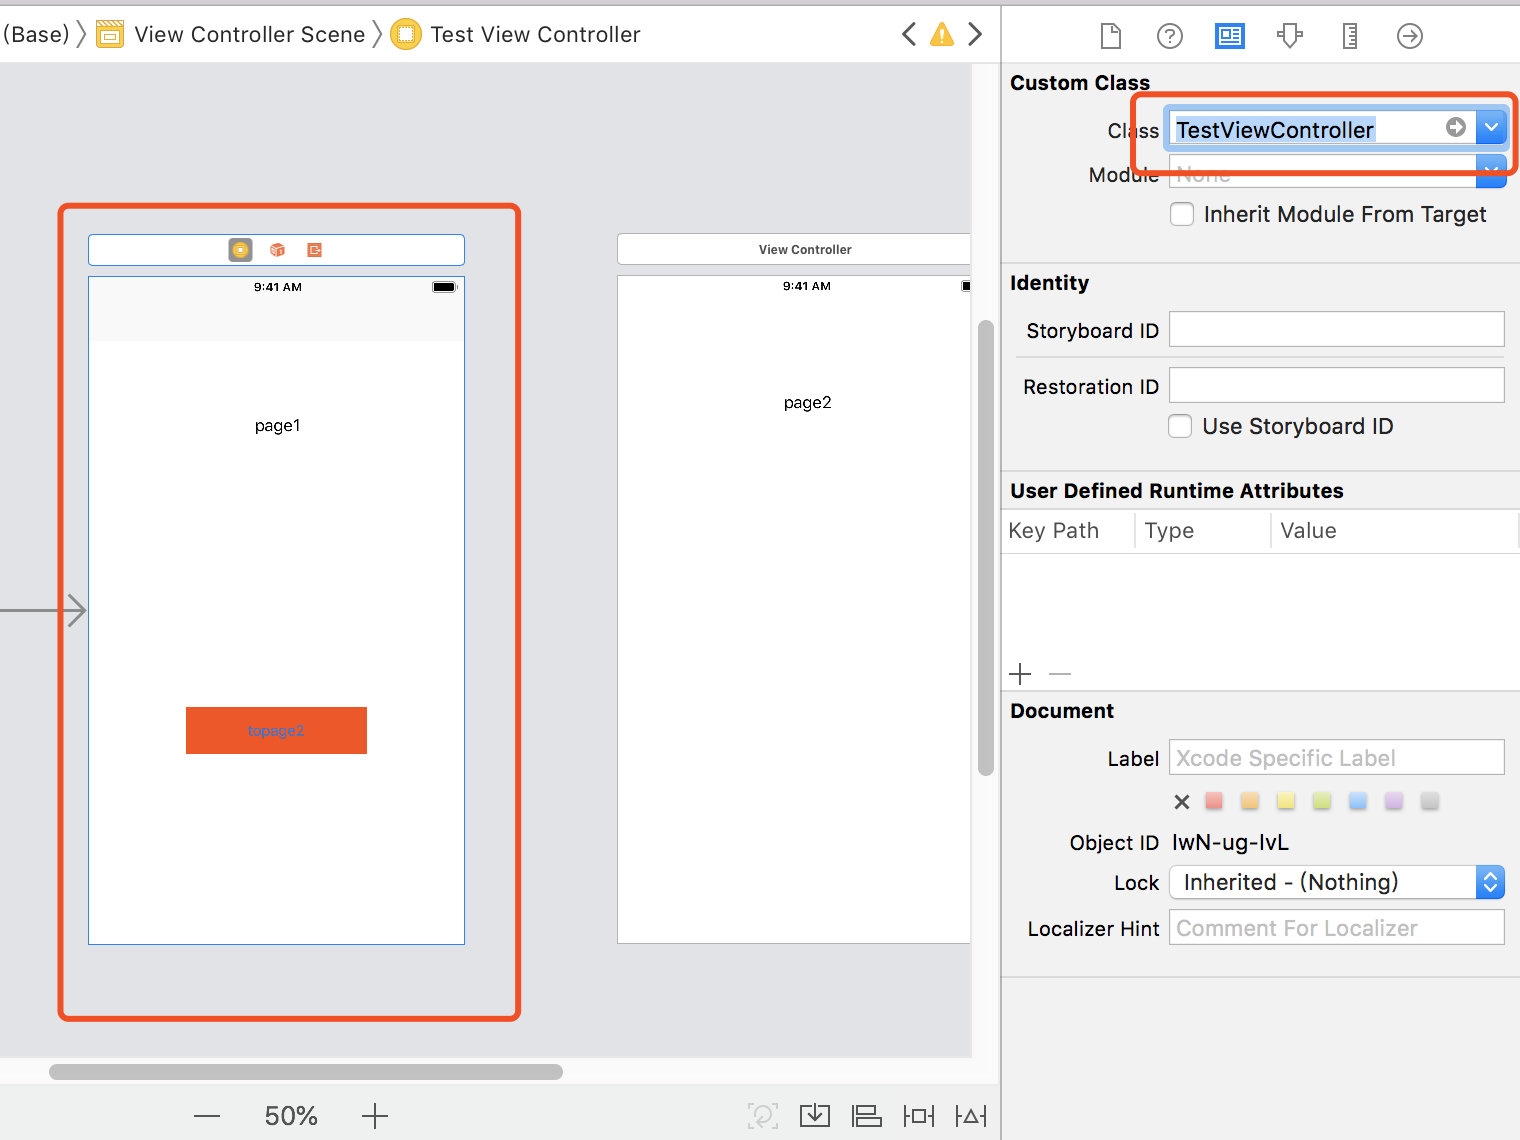
新建一个TestViewController 继承UIViewController
将带按钮的Controller Class设置为TestViewController
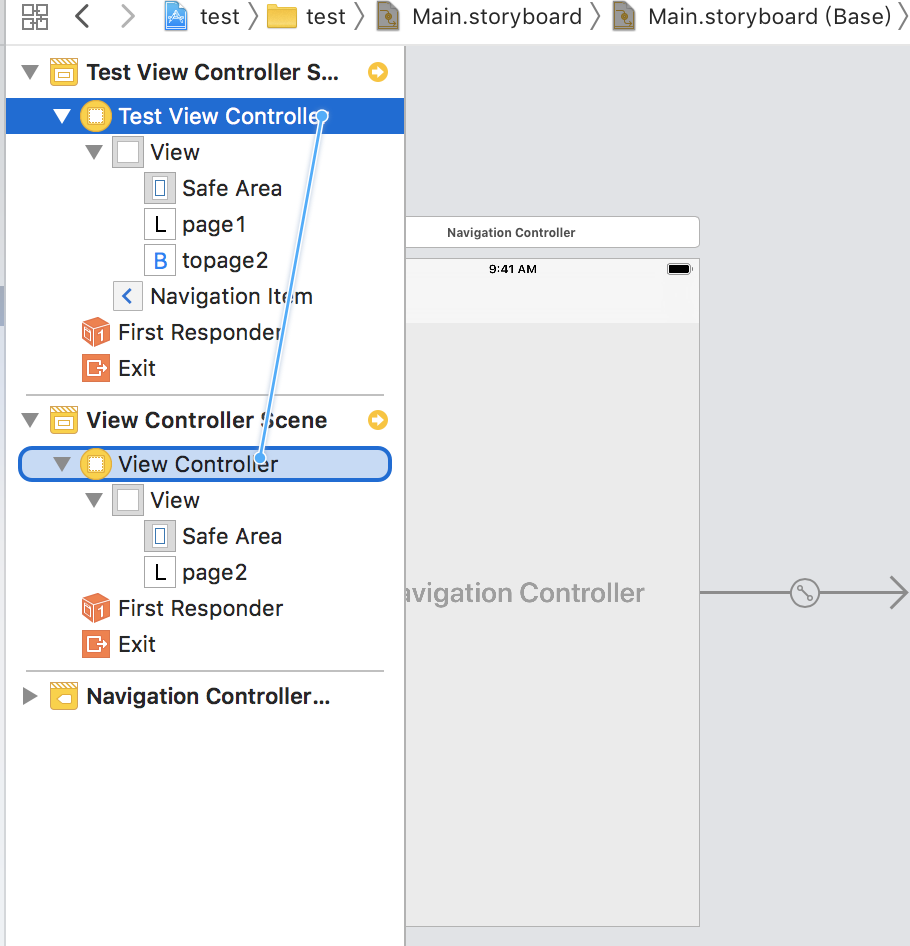
将两个页面连线。注意。这里不是按钮连线 是页面的连线
选择push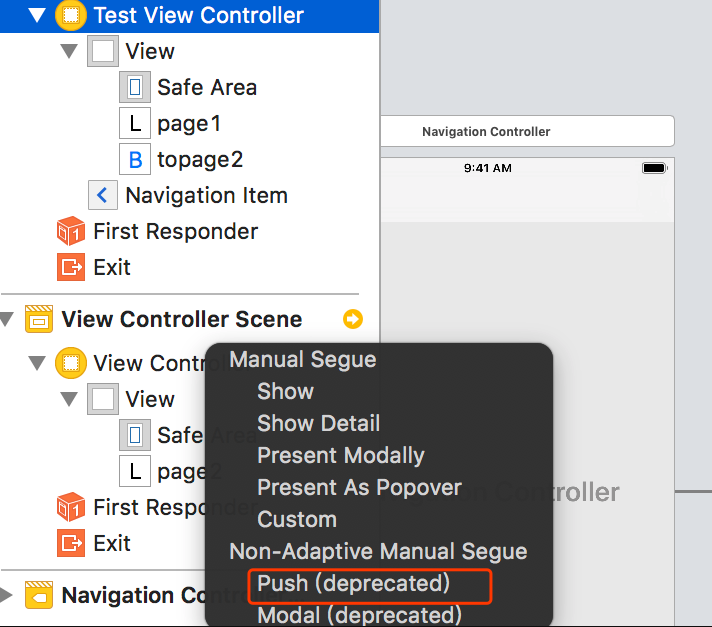
选择生成的连线设置 Identifier为page2_id,代码部分会用到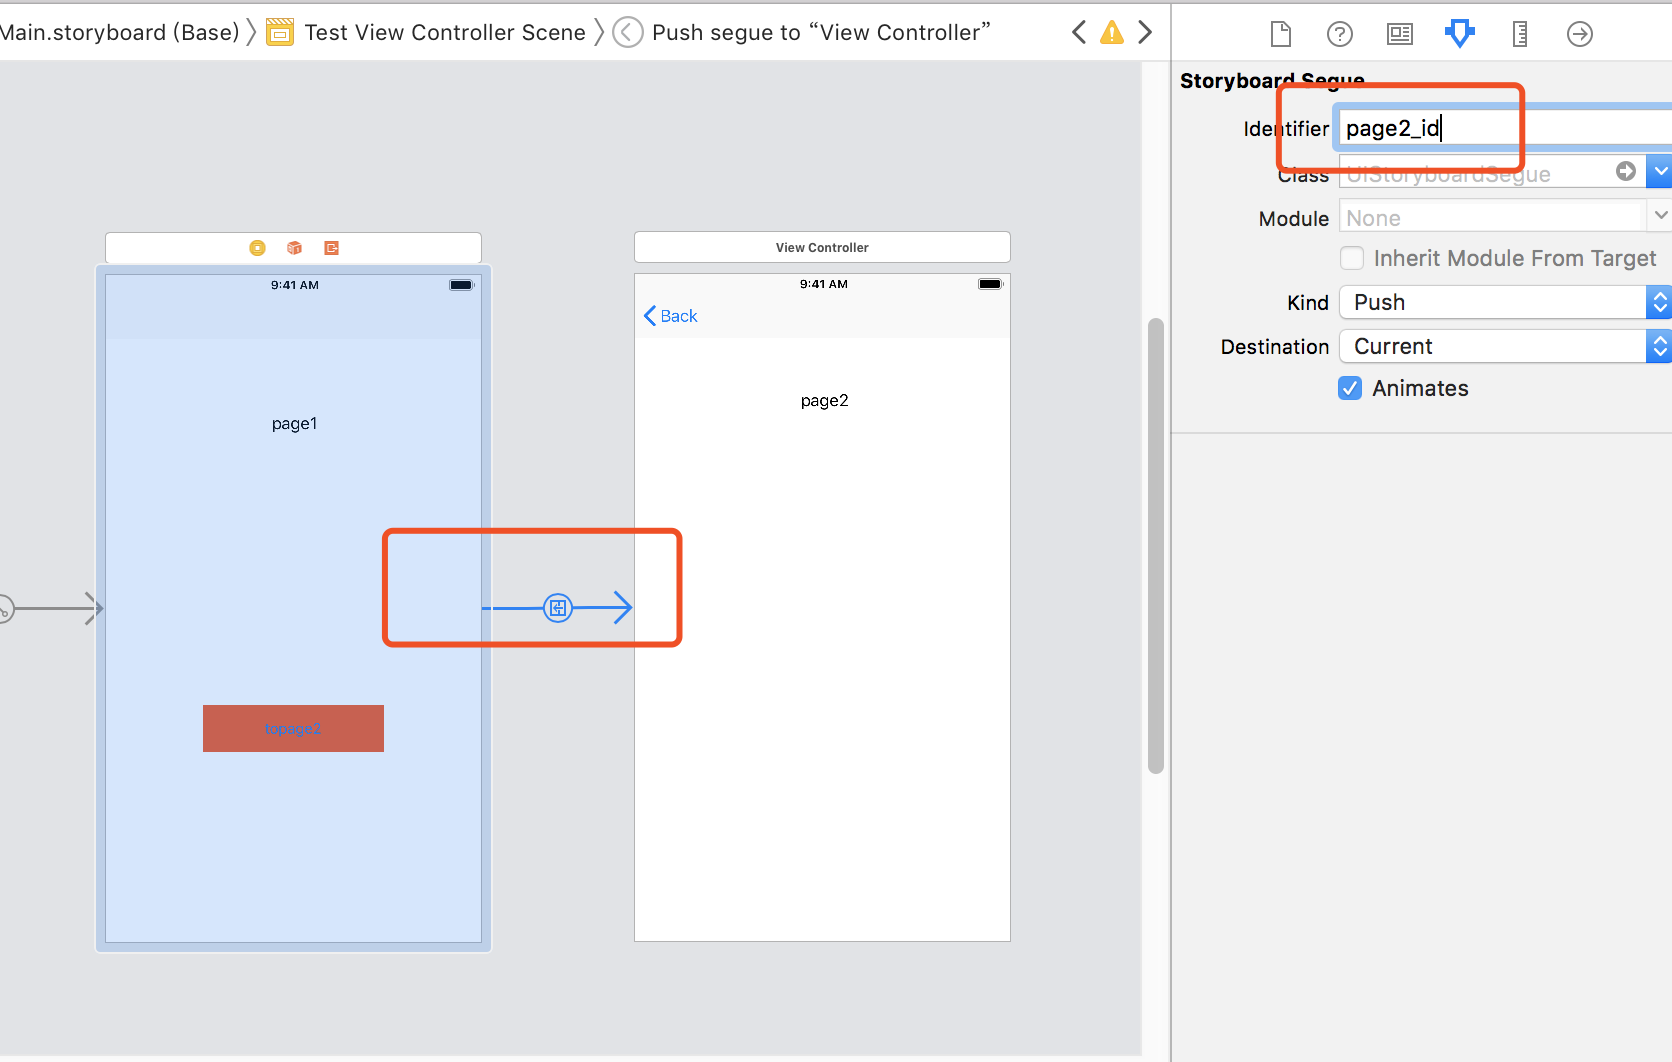
button 连线点击方法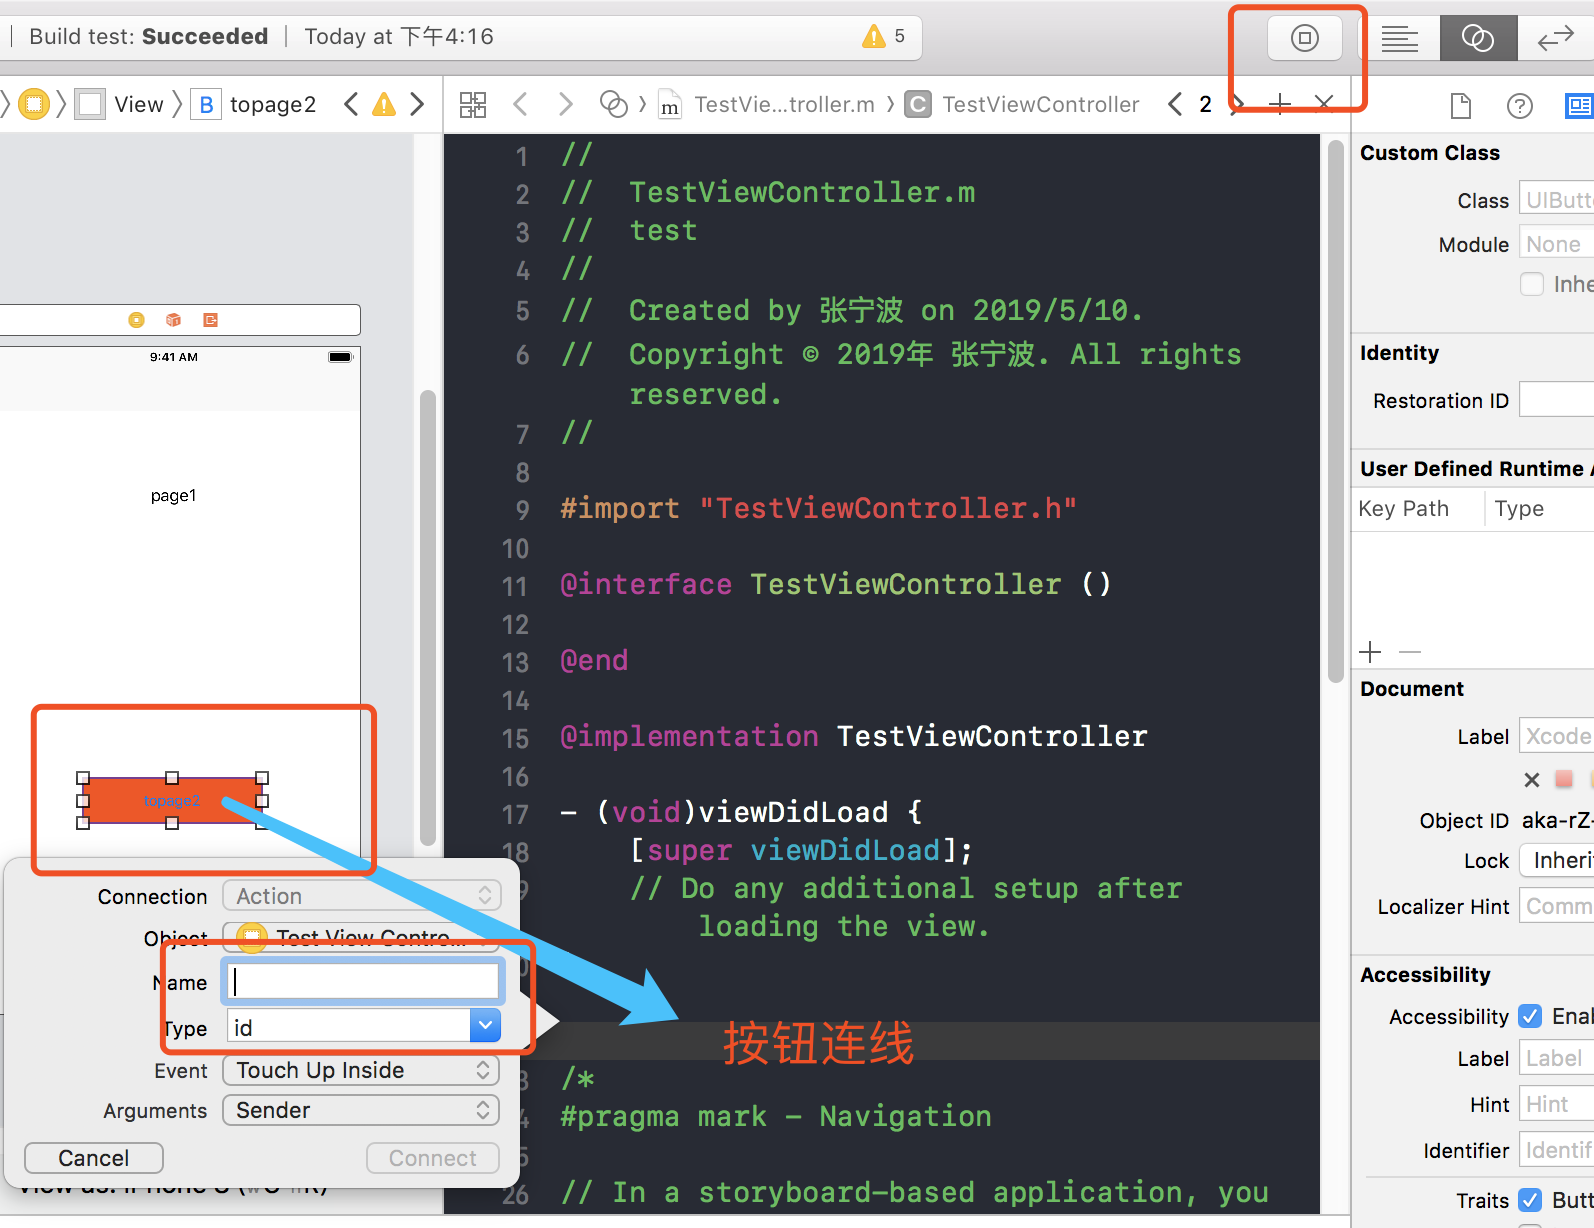
在button的点击方法中 根据设置好的 Identifier 进行跳转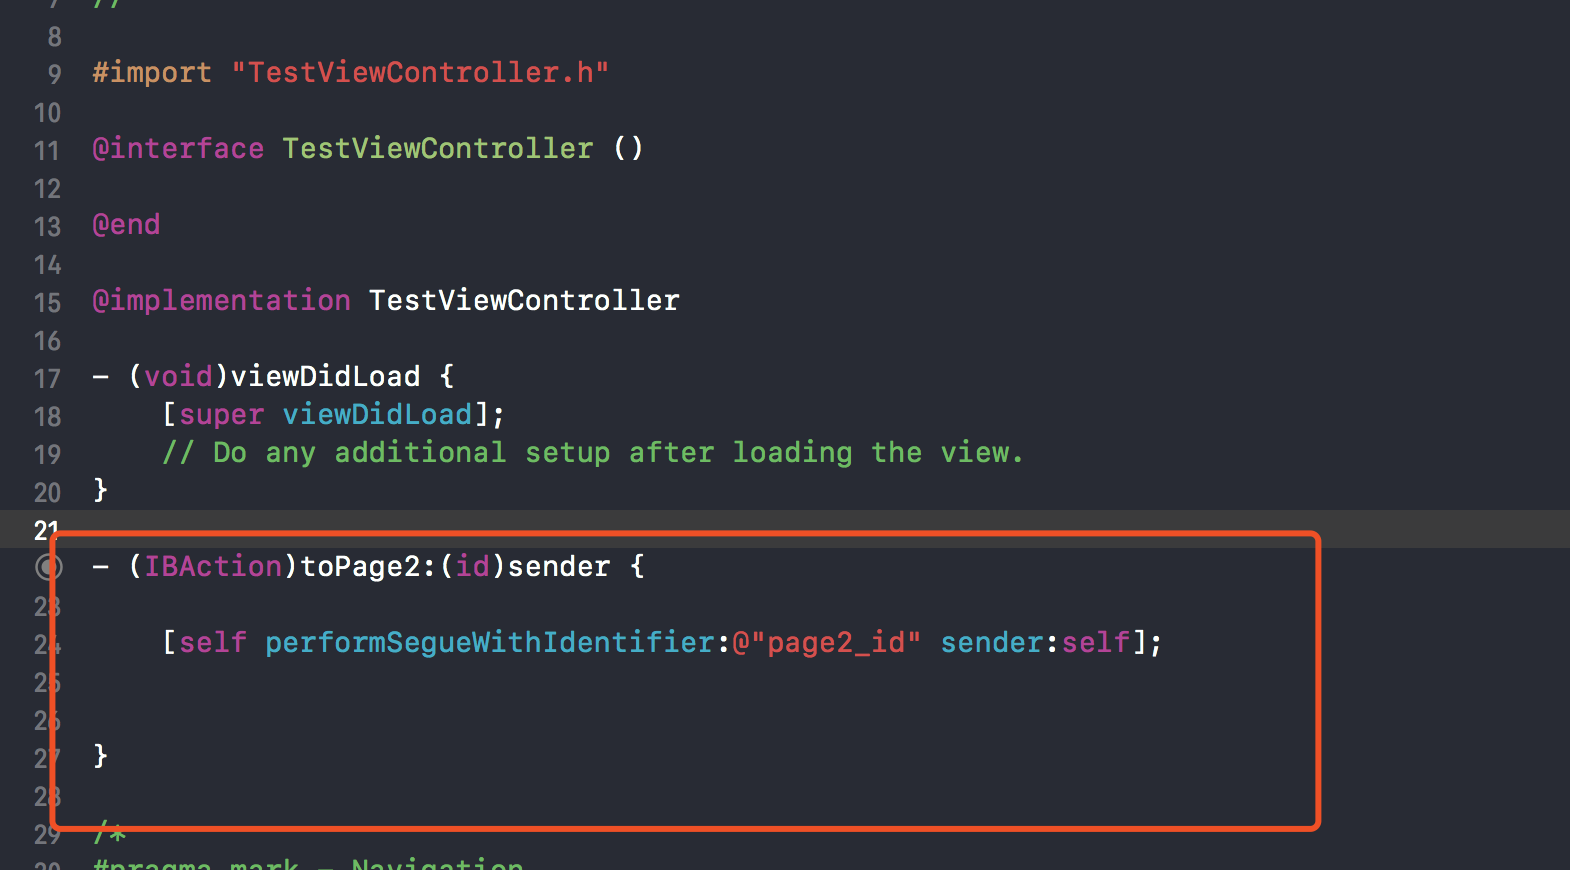
一样可以实现页面的跳转
Storyboard传值
1利用prepareForSegue方法跳转传值
首页请在前文 配合代码跳转 实现的基础上进行操作
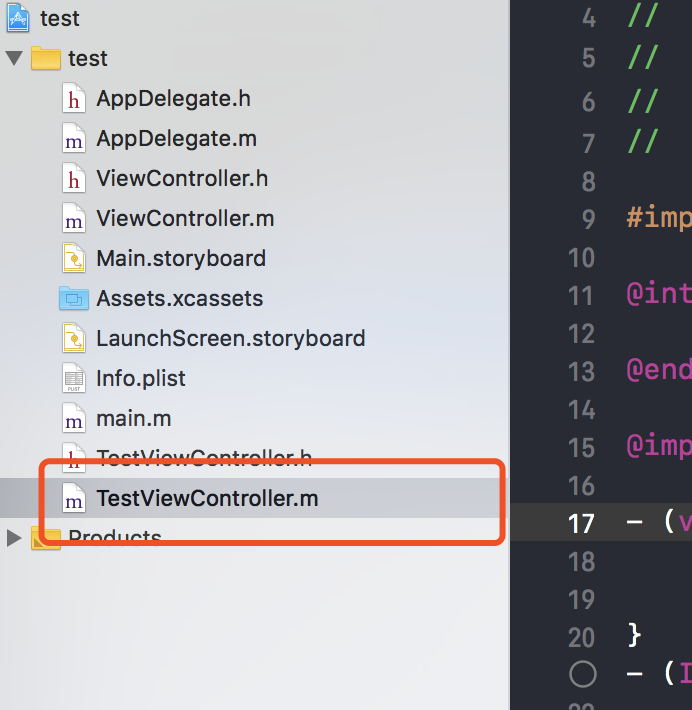
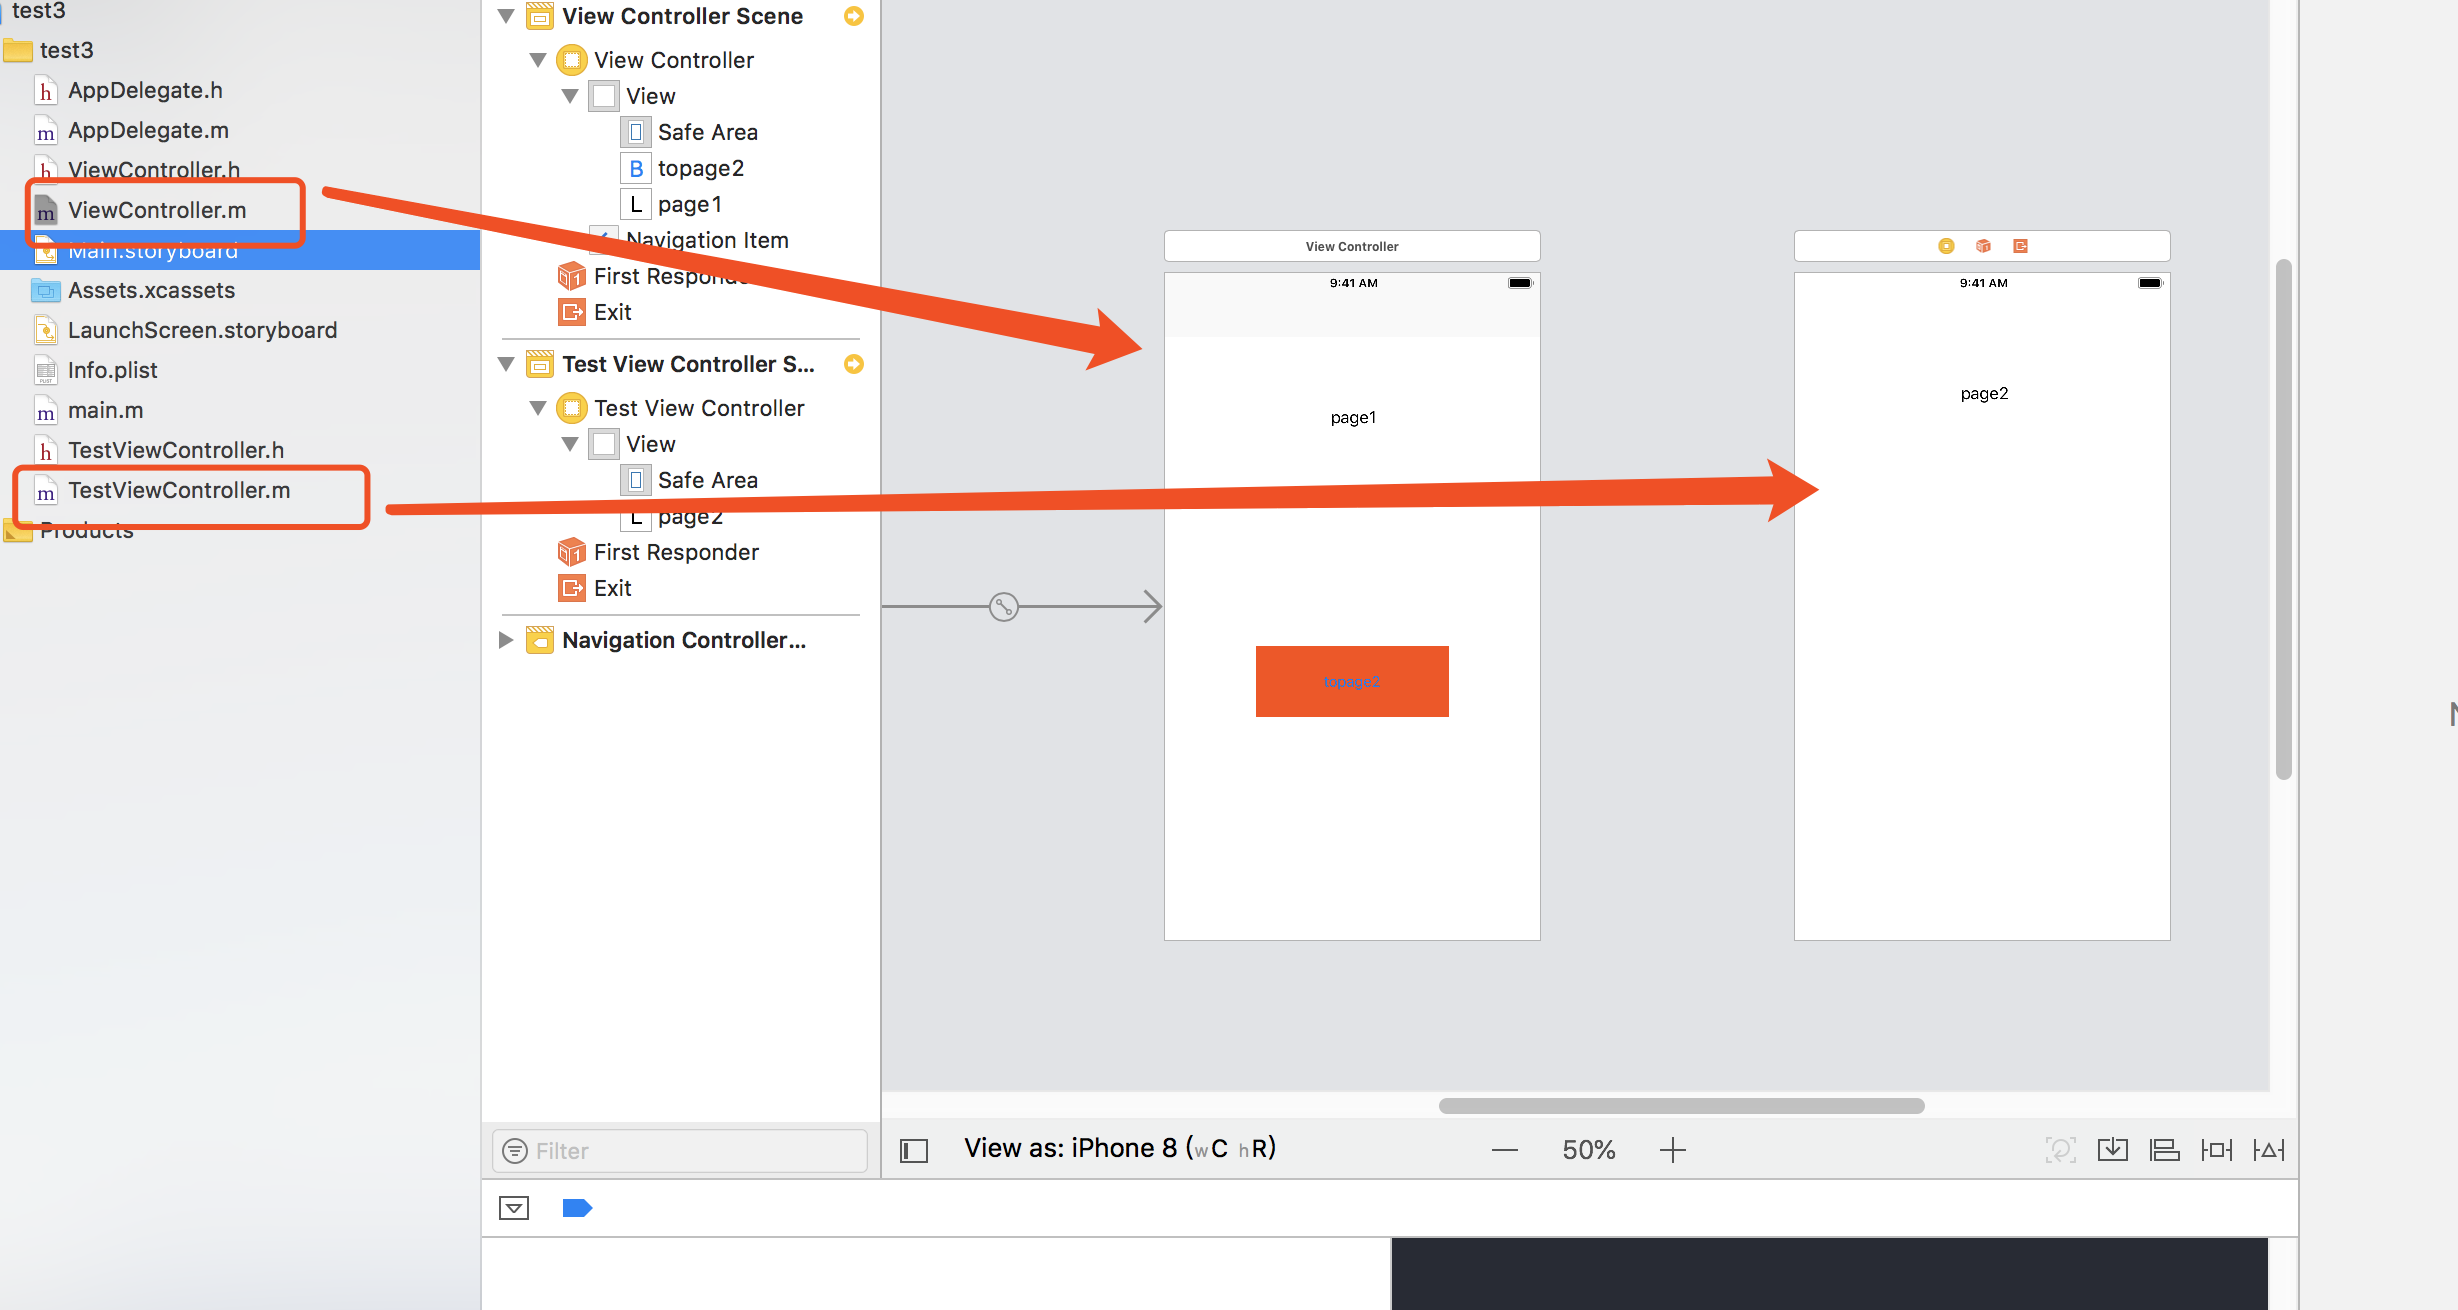
这时候文件结构 和Main.storyboard结构如下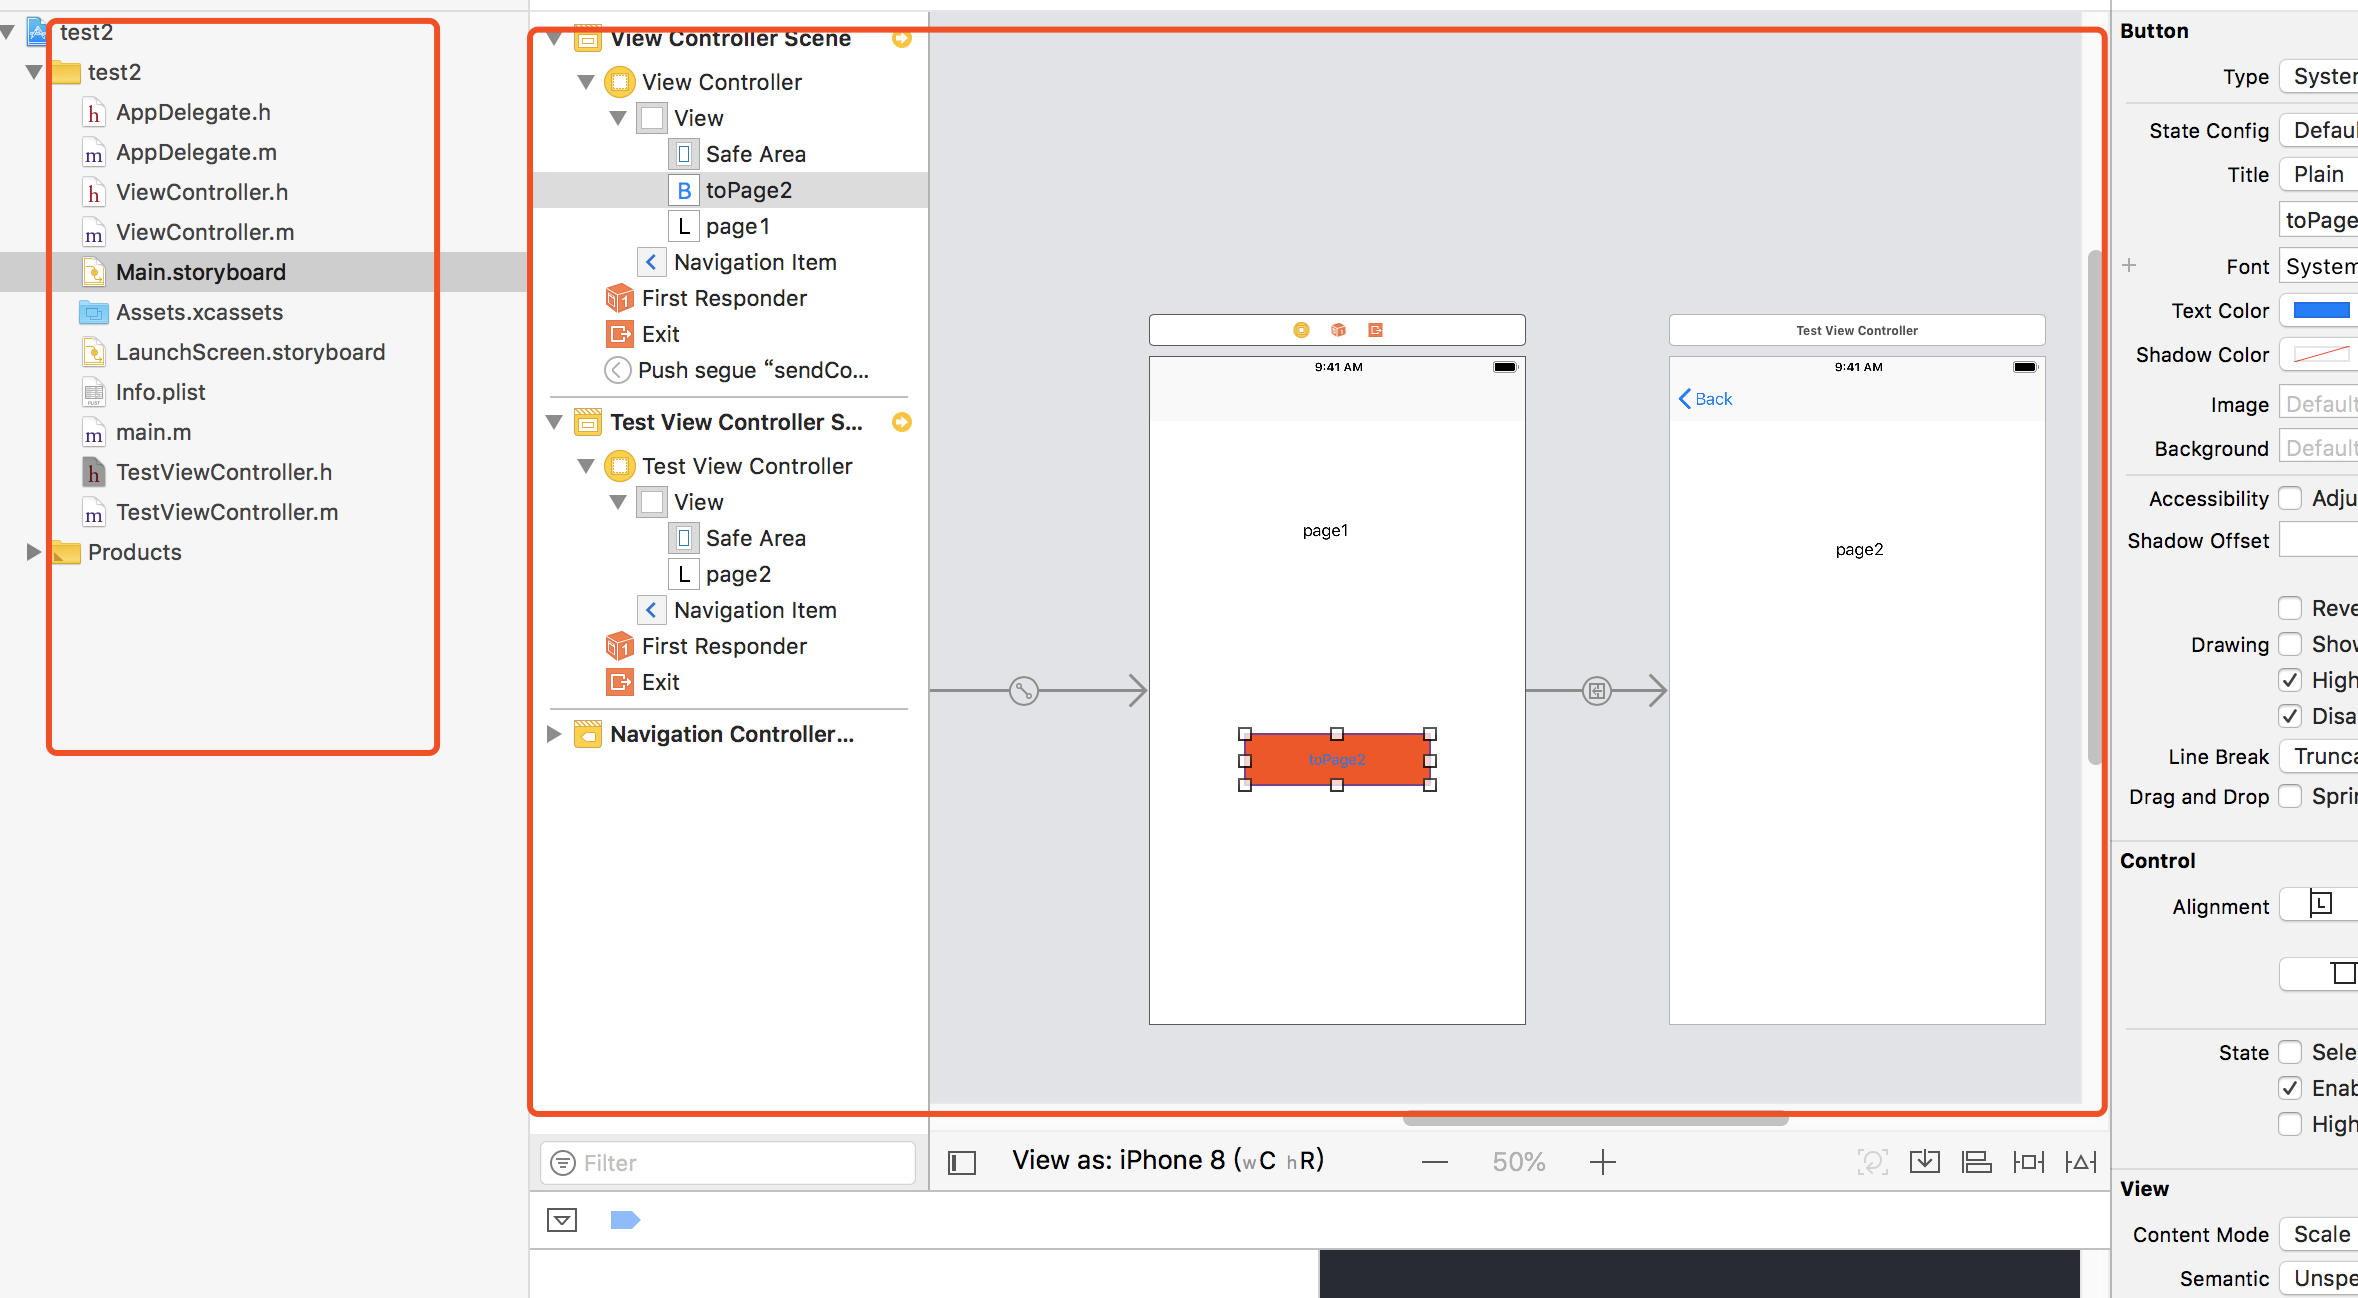
点击页面之间的连线 修改Identifier为sendContent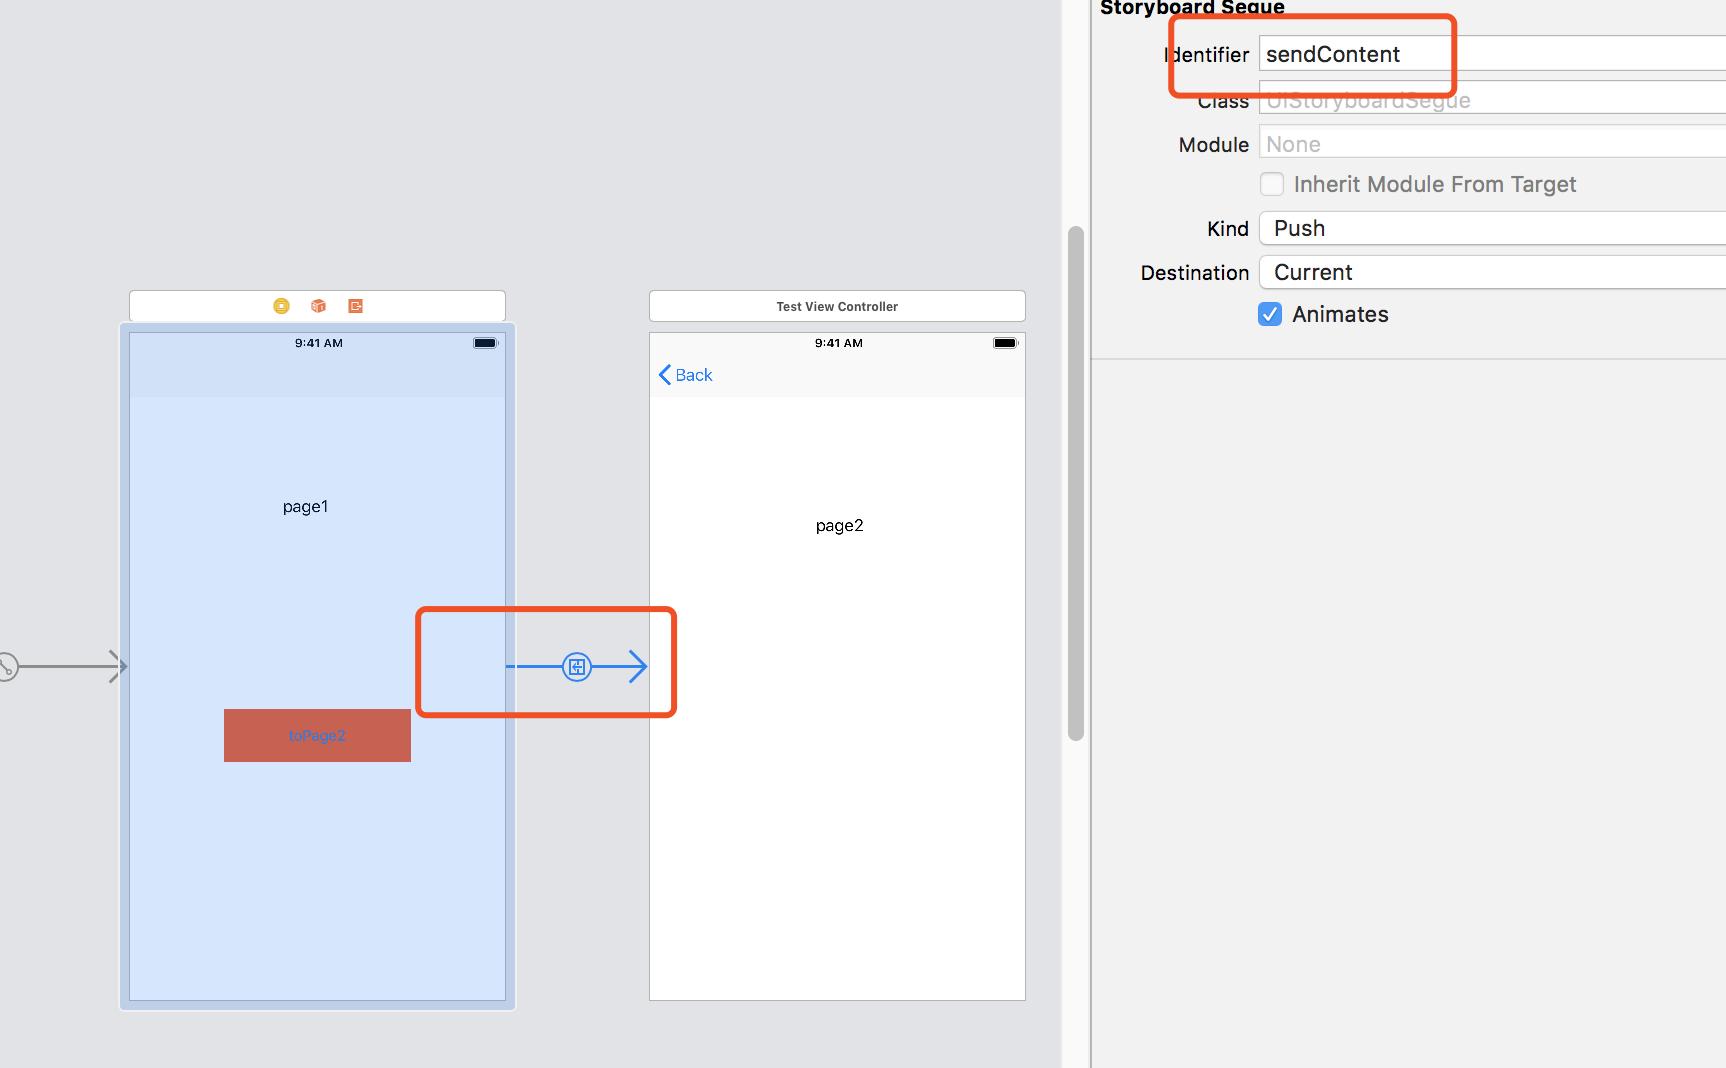
并且修改按钮点击方法中的代码 identifier为sendContent

在第一个页面对应的Controller中添加(void)prepareForSegue:(UIStoryboardSegue *)segue sender:(id)sender 方法 并根据设置的identifier进行判断传值即可。注意。这里不用重复写跳转代码了。因为按钮的的点击事件中写了
- (IBAction)goAction:(id)sender {
    [self performSegueWithIdentifier:@"sendContent" sender:self];
}

- (void)prepareForSegue:(UIStoryboardSegue *)segue sender:(id)sender {
    if([segue.identifier isEqualToString:@"sendContent"]) {
        TestViewController *controller = segue.destinationViewController;
        controller.content = @"菠菜";
    }
}
TestViewController 中 定义变量接收。打出log验证即可
- (void)viewDidLoad {
    [super viewDidLoad];
    // Do any additional setup after loading the view.

    NSLog(@"name = %@ ",self.content);
}
效果如图: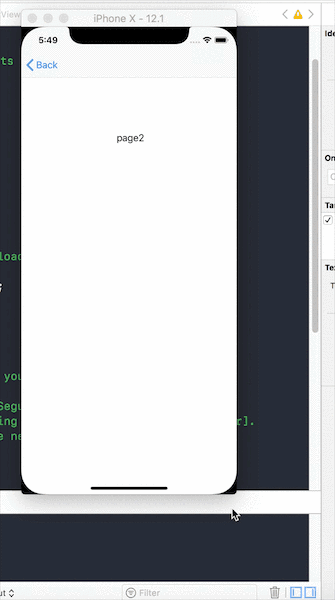
2利用Storyboard Id跳转传值
参考前文内容 新建项目。新建两个Controller
Main.storyboard 中 添加Navigation Controller 设置对应的class 但是不进行连线
效果如图:
设置要跳向的页面TestViewController 的Storyboard Id为 IdTest
给ViewController中的按钮绑定点击方法。直接利用 storyboard Id获取controller进行push跳转 并传值
@interface ViewController ()

@end

@implementation ViewController

- (void)viewDidLoad {
    [super viewDidLoad];
    // Do any additional setup after loading the view, typically from a nib.
}

- (IBAction)action:(id)sender {

    UIStoryboard *storyboard = [UIStoryboard storyboardWithName:@"Main" bundle:nil];

    TestViewController *controller = [storyboard instantiateViewControllerWithIdentifier:@"IdTest"];
    controller.content = @"菠菜";

    [self.navigationController pushViewController:controller animated:YES];
}

@end
TestViewController中的Log部分不再赘述了。